Following your tooth extraction, the next 24 hours are absolutely crucial for securing your long-term dental health. Think of this initial period as setting the stage for a smooth, complication-free recovery that protects your smile. Our main goals are simple but vital: control any bleeding, protect the new blood clot, and manage the initial swelling and discomfort.
Getting this part right from the very beginning makes all the difference in achieving a healthy, stable outcome.
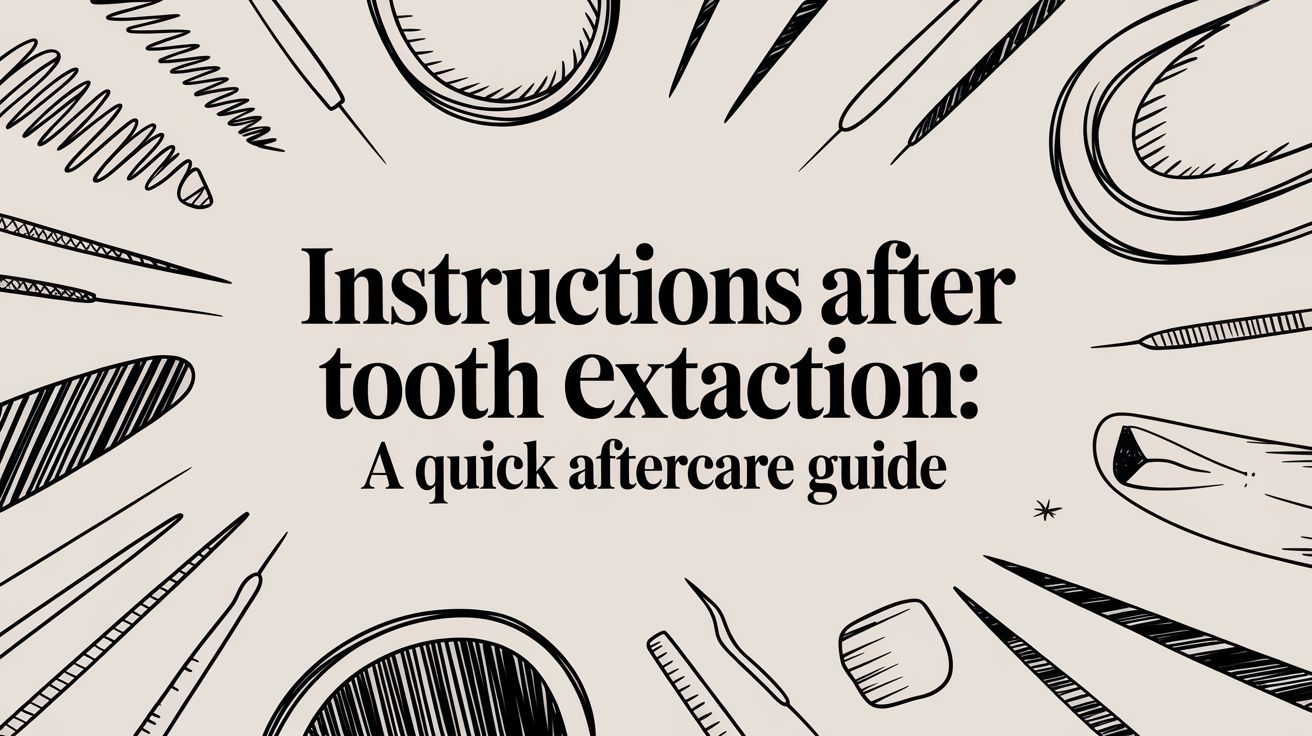
Your First 24 Hours After Tooth Extraction
That first day is, without a doubt, the most critical phase of your recovery. Every action you take—or don't take—has a direct impact on how well the extraction site heals, which is the first step toward restoring your healthy smile.
Your number one job is to protect the delicate blood clot that's forming in the empty socket. This clot is nature’s perfect bandage; it shields the underlying bone and nerves, and you want to do everything you can to keep it safe. A clear plan removes the guesswork and helps you feel in control of your healing journey.
The First Few Hours Post-Procedure
Right after the procedure here at Grand Parkway Smiles, we'll place a sterile gauze pad over the socket. Your immediate task is to bite down on it with firm, steady pressure. This pressure is the key to stopping the bleeding and helping that vital blood clot form, which is essential for proper healing of the bone and gums.
- Bite on Gauze: Keep that firm pressure going for at least 30-45 minutes. Try not to talk or chew on it, as any movement can disrupt the process.
- Change Gauze as Needed: If the gauze gets soaked, you can swap it out. Just fold a fresh piece into a small, thick square, place it directly over the socket, and get back to biting down.
- Rest is Essential: Seriously. Go home and take it easy. Don't do any heavy lifting, strenuous activity, or even bend over for the rest of the day. Anything that gets your blood pressure up can trigger fresh bleeding and delay healing.
Managing Swelling and Pain Proactively
The best time to get ahead of pain and swelling is before the local anesthetic wears off. Don't wait around for the discomfort to kick in. Managing this effectively helps your body focus its energy on healing the area properly.
Being proactive, not reactive, is the most effective strategy for managing post-extraction discomfort. Taking your first dose of pain reliever while your mouth is still numb and starting a cold compress routine right away can dramatically reduce both pain and swelling over the next 48 hours.
An ice pack or a bag of frozen peas wrapped in a towel is your best friend right now. Applying it to your cheek on the side of the extraction helps constrict blood vessels, which minimizes swelling and provides a nice numbing effect. The classic routine is 20 minutes on, 20 minutes off. This cycle gives you all the anti-inflammatory benefits without harming the skin tissue.
To help you stay on track, we've put together a simple timeline for that first critical day.
Post-Extraction Timeline The First 24 Hours
This table breaks down the key actions and precautions for the immediate recovery period. Following this guide can help ensure the healing process gets off to the best possible start, protecting the health of the surrounding teeth and gums.
| Timeframe | What to Do | What to Avoid |
|---|---|---|
| 0-1 Hour | Bite down firmly on the gauze provided. Head home and rest. | Talking, chewing, or spitting. |
| 1-3 Hours | Take your first dose of pain medication (before numbness wears off). Start the 20-min on/off ice pack cycle. | Rinsing your mouth. Drinking hot liquids. |
| 3-12 Hours | Replace gauze as needed if bleeding continues. Drink plenty of cool water. Eat soft, cool foods (yogurt, applesauce). | Using straws, smoking, drinking alcohol. Strenuous activity. |
| 12-24 Hours | Continue resting and limit physical activity. Keep your head elevated with pillows when sleeping. | Forceful spitting. Touching the extraction site with your tongue or fingers. |
By sticking to these simple steps, you're actively preventing complications and setting yourself up for a much smoother recovery. For a deeper dive into the healing process, check out our detailed guide on the oral surgery healing timeline.
This image highlights the three most important actions for your immediate care: using gauze, applying an ice pack, and avoiding straws.
These simple, sequential actions are truly the cornerstone of a successful first day of healing.
Protecting the Healing Site
The guidelines we give our patients are based on decades of clinical experience and are designed to protect your oral health for the best possible outcome. For the remainder of that first 24-hour period, your focus should be on a few critical "don'ts."
- Do Not Use Straws: The suction from a straw is powerful enough to dislodge the blood clot, which can lead to a very painful condition called dry socket and delay healing.
- Do Not Spit Forcefully: Just like using a straw, spitting creates negative pressure in your mouth. If you need to rinse, just let the liquid gently fall out into the sink.
- Do Not Smoke or Use Tobacco: Smoking is one of the worst things you can do for a healing wound. It restricts blood flow, introduces contaminants, and is a major risk factor for developing a dry socket.
- Do Not Consume Hot Liquids: Things like hot coffee, tea, or soup can interfere with the clot or even dissolve it. Stick with cool or lukewarm options for the first day.
How to Effectively Manage Pain and Swelling
Getting ahead of discomfort after an extraction is the name of the game. Instead of chasing pain, we want you to stay in front of it. This isn’t just about being comfortable; it's a key part of helping your body heal efficiently so you can get back to feeling your best.
The real trick is to take your first dose of pain reliever before the local anesthetic wears off completely. Think of it as building a defensive wall before the pain even has a chance to show up. This one simple move can set a much more comfortable tone for the first 24-48 hours.
Creating a Proactive Medication Schedule
A smart medication schedule is your best defense. Depending on how complex your extraction was, we at Grand Parkway Smiles might have prescribed something specific or recommended an over-the-counter option like ibuprofen.
A really effective approach, if we've given you the green light, is to alternate between different types of pain relievers. You could take an anti-inflammatory like ibuprofen, and then a few hours later, take acetaminophen. This creates an overlap in coverage, so as one medication starts to fade, the other is already working. It’s a great way to prevent pain from breaking through.
Key Takeaway: Please don't wait for the pain to become severe before taking your medication. It's so much easier to keep discomfort at a low, manageable level than it is to knock it back down from a high one. For the first couple of days, sticking to that schedule is everything.
If you're looking for more information, you can find some comprehensive pain management strategies that offer broader insights.
Mastering Temperature Therapy for Healing
Tackling swelling is just as important as managing pain, and that's where temperature therapy comes in. A little swelling is totally normal, but keeping it in check will reduce discomfort and stiffness, helping your facial appearance return to normal more quickly.
- The Cold Phase (First 48 Hours): For the first two days, ice packs are your new best friend. Apply a cold pack—or even a bag of frozen peas wrapped in a towel—to the outside of your cheek. This helps constrict the blood vessels, which minimizes fluid buildup and swelling. It also has a wonderful numbing effect. Just follow this simple cycle: 20 minutes on, then 20 minutes off.
- The Warm Phase (After 48 Hours): Once you’ve passed the 48-hour mark, it's time to switch to warm, moist heat. A warm washcloth applied to your cheek helps boost circulation. This brings fresh blood flow to the area, which can ease any lingering stiffness in your jaw and help with the final stages of healing.
Simple Adjustments for Maximum Comfort
Beyond the meds and compresses, a few tiny adjustments to how you rest can make a huge difference. You're basically using gravity to your advantage to promote better healing.
One of the easiest things you can do is to keep your head elevated. When you lie down to rest or sleep, just prop your head up with an extra pillow or two. This simple positioning helps drain fluid away from the extraction site instead of letting it pool there overnight. It's a small change that can make a surprisingly big difference in how much swelling you see in the morning.
Navigating Your Post-Extraction Diet
Let's talk about one of the most common questions we get: "What can I eat after my tooth extraction?" It’s a great question, because what you eat plays a huge role in how you heal. Good nutrition gives your body the fuel it needs to recover quickly, while the right food textures protect that delicate healing area.
Getting your diet right from day one is the best way to ensure the socket heals properly, setting a healthy foundation for whatever comes next for your smile.

The First Few Days: Soft Foods Only
For the first 24-48 hours, your diet needs to be incredibly gentle. Think liquids, purées, and anything that requires absolutely no chewing. This is when the protective blood clot is forming, and it's extremely fragile. Any real pressure or suction can dislodge it, and trust me, you want to avoid that.
Your only job is to get nourishment without disturbing the healing site. Think of it as a "construction zone" for new tissue—the last thing you want to do is send a "wrecking ball" like a crunchy chip in there. Sticking to truly soft foods is one of the most important instructions after tooth extraction you can follow.
Here are a few patient-favorites for those first couple of days:
- Lukewarm Soups: Smooth, blended soups like tomato or butternut squash are perfect. Just make sure they aren't too hot, as high temperatures can bother the new clot.
- Yogurt and Pudding: Easy, no-chew options that are also a good source of protein for tissue repair.
- Smoothies: A fantastic way to pack in nutrients. But remember the golden rule: absolutely no straws. The suction is a major risk for dislodging the clot.
- Applesauce and Mashed Bananas: Gentle on the healing area and a great source of natural energy.
Transitioning Back to Normal
After about day three, you’ll likely start to feel much better. This is a good time to gradually introduce semi-soft foods back into your diet. It's a great sign that your body is healing well! The key is to listen to your body and chew carefully, preferably on the side opposite the extraction.
This transition lets you get more variety and nutrients while still protecting the site. It’s also a nice milestone that helps you feel like you're getting back to your normal routine and enjoying food again.
When you start adding foods back in, test your comfort level with each new texture. If something causes discomfort, that’s your body’s way of saying it’s not quite ready. Just wait another day or two before trying again. Patience is your best friend here.
Foods to consider adding as you feel up to it:
- Scrambled eggs
- Mashed potatoes
- Oatmeal or cream of wheat
- Soft, flaky fish
- Well-cooked pasta
To help you stay on track, we've put together a simple table outlining what's safe to eat and when.
Safe Foods For Your Tooth Extraction Recovery
This table is a simple guide to help you choose the right foods throughout your healing process. Sticking to these recommendations can make a big difference in how quickly and comfortably you recover.
| Recovery Phase (Days) | Recommended Foods | Foods to Strictly Avoid |
|---|---|---|
| Days 1-2 | Smoothies (no straw), lukewarm blended soups, yogurt, pudding, applesauce, Jell-O | Anything hard, crunchy, sticky, spicy, acidic, or hot. No straws, alcohol, or tobacco. |
| Days 3-5 | Scrambled eggs, mashed potatoes, oatmeal, soft pasta, flaky fish, cottage cheese | Chips, popcorn, nuts, hard candy, steak, crusty bread, foods with small seeds. |
| Days 6+ | Soft chicken, well-cooked vegetables, soft fruits. Gradually reintroduce normal foods. | Continue avoiding very hard or sharp foods (like tortilla chips) until fully healed. |
Remember to always chew on the opposite side of your mouth and listen to your body. If something hurts, stop and give it more time.
Foods and Habits to Strictly Avoid
Knowing what not to do is just as critical as knowing what to do. Certain foods and habits can cause pain, introduce bacteria, or, worst of all, dislodge that vital blood clot. This can seriously set back your recovery and compromise the health of the site.
It’s not just anecdotal advice; the data backs it up. One study focusing on wisdom tooth removal found that over 80% of patients who strictly avoided solid foods had complication rates below 5%. That’s a huge difference! This really highlights how your diet is one of the most important factors in a successful recovery. If you're interested, you can read more about the study's findings on post-extraction care online.
To keep your healing on track, make sure you avoid:
- Crunchy or Hard Foods: Chips, popcorn, nuts, and hard candies can easily break into sharp pieces that can injure the delicate gum tissue.
- Sticky Foods: Things like caramel, taffy, and gummy candies can pull on the healing site and dislodge the clot.
- Spicy and Acidic Foods: These will cause a very unpleasant burning sensation in an open wound. Think hot sauce, citrus, and tomato-based sauces.
- Foods with Small Seeds or Grains: Strawberries, raspberries, and seeded breads are notorious for getting seeds stuck in the socket, which can lead to infection.
- Alcohol and Tobacco: Both are major roadblocks to healing. Smoking, in particular, is one of the leading causes of dry socket—a painful complication you definitely want to avoid.
Keeping the Extraction Site Clean and Healthy
Alright, you've made it through the first 24 hours. Now, the game changes slightly. Your focus shifts to keeping the area clean as it begins to heal, which is vital for preventing infection and ensuring your gums heal beautifully. This part is a bit of a balancing act—you need to clear away any food debris, but you have to be incredibly gentle to protect that fragile new tissue.
The best tool in your arsenal for this is a simple warm saltwater rinse. Wait until at least 24 hours have passed since your procedure, then mix half a teaspoon of salt into a glass of warm water. This creates a gentle, natural rinse that helps the healing process along without any harsh chemicals.
The Right Way to Rinse
How you rinse is just as important as what you rinse with. Forget about vigorous swishing or spitting. Both can create enough pressure to dislodge the blood clot, and that's the last thing you want.
Instead, think gentle. Take a sip of the saltwater solution and simply tilt your head from side to side, letting the water flow softly over the extraction site. When you're done, just lean over the sink and let the water fall out of your mouth. No pressure, no problem. This simple technique is all it takes to clean the area effectively and promote a healthy healing environment.
We know from experience that clear instructions make a huge difference in healing. In fact, research backs this up. A comparative study showed that patients who got specific advice on oral hygiene were 40% less likely to run into issues like infection or dry socket. If you're interested in the data, you can explore the full study on postoperative care guidelines and see the findings for yourself.
Plan on doing this gentle rinse two or three times a day, especially after you eat. It’s the best way to keep the socket clean and free of debris.
Brushing Your Other Teeth
You absolutely should keep brushing the rest of your teeth. Maintaining your normal hygiene routine is key to overall oral health, but you'll need to make one big adjustment: give the extraction site a wide berth.
- Be Mindful: Grab a soft-bristled toothbrush and take it slow. No need to rush.
- Avoid the Socket: Make sure your toothbrush doesn't even get close to the healing socket or the teeth right next to it. Any contact can be painful and set back your healing.
- Skip the Forceful Spit: Once you're finished brushing, rinse gently with plain water using that same "head tilt" method. A big, forceful spit is off the table for now.
These careful steps keep plaque and bacteria from building up elsewhere in your mouth, which helps create a healthier environment for the socket to heal in.
Why This Gentle Approach Matters
Every single one of these instructions is designed to do one thing: protect that healing socket. The blood clot and the delicate new tissue underneath need a clean, stable space to do their work. By avoiding aggressive movements and direct contact, you're giving your body the best possible shot at a smooth recovery. Following these specific instructions after tooth extraction is your ticket to keeping your healing on track and protecting the health of your jawbone and gums for the long haul, preserving the foundation of your smile.
Warning Signs and When to Call Your Dentist
The vast majority of tooth extraction recoveries are smooth and uneventful, but it's always smart to know what to look out for. Think of this as your troubleshooting guide. Understanding the difference between what’s normal and what’s not gives you the power to take an active role in protecting your dental health.
It’s completely normal to have some soreness, a bit of swelling, and minor oozing for the first day or two. But certain symptoms are your body's way of waving a red flag, telling you it's time to get a professional opinion.
Recognizing a Dry Socket
You've probably heard of a "dry socket." It's the most common complication, and it happens when that all-important blood clot gets knocked out or dissolves before the socket has had a chance to heal. This leaves the bone and nerve endings underneath exposed, which, as you can imagine, is quite painful and delays proper healing.
The key symptom isn't just pain—it's a very specific type of pain. Typically, it’s a deep, throbbing ache that shows up 3 to 4 days after your procedure, often right when you thought you were in the clear. The pain can radiate up towards your ear and is often accompanied by a foul taste or bad breath.
If there’s one thing to remember, it’s this: pain after an extraction should steadily get better, not worse. If your pain suddenly ramps up a few days after your surgery, that’s the classic sign of a dry socket. It’s time to call us.
Want to know more? Our detailed guide breaks down the symptoms and treatment for dry socket at https://dentistkatytx.com/dry-socket-katy-tx.
Identifying Signs of Infection
While we do everything possible to keep things sterile, infections can occasionally happen. An infected socket looks and feels very different from one that's healing properly and can pose a risk to your overall health if left untreated.
You might see some whitish tissue in the healing socket, which is called granulation tissue and is perfectly normal. An infection, however, is much more obvious.
- Pus or Discharge: Any yellow or white fluid coming from the socket is a sure sign of infection.
- Worsening Swelling: Swelling should peak around day three and then start to subside. If it gets worse after that, something's not right.
- Fever or Chills: Feeling feverish or generally unwell can mean the infection is spreading.
- Persistent Bad Taste or Odor: A nasty taste or smell that gentle salt water rinses can't get rid of often points to a bacterial issue.
Dealing with Persistent Bleeding
A little bit of oozing mixed with your saliva is expected for the first 24 hours. What's not normal is a steady flow of bright red blood that soaks through a gauze pad in less than an hour.
If this happens, try this first: fold a fresh piece of gauze, place it over the site, and bite down with firm, continuous pressure for a solid 45 minutes. No peeking! If it's still bleeding heavily after that, you need to call our office for advice.
When You Absolutely Need to Call Us
Trust your gut. You know your body better than anyone. If something just feels off, it's always better to be safe and give us a call to ensure your dental health is protected.
Please contact Grand Parkway Smiles immediately if you experience any of these:
- Severe, throbbing pain that isn't touched by your medication and gets worse days after the extraction.
- Bleeding that you can't get under control after applying firm pressure.
- Swelling that continues to get worse after the third day.
- Any signs of infection, like pus, fever, or a foul odor.
- Any difficulty swallowing or breathing.
If you run into issues after hours and need general medical advice, an online doctor prescription consultation can be a useful resource. However, for anything directly related to the extraction site, your first call should always be to your dental team.
Common Questions About Extraction Aftercare
Even with the best instructions, it's completely normal for a few questions to pop up once you get home. We've put together answers to the most common concerns we hear from our patients right here at Grand Parkway Smiles. Think of this as your go-to guide for a little extra peace of mind about your healing process.
Following the specific instructions after tooth extraction we gave you is always the best path to a smooth, quick recovery and a healthy final result.
How Long Does The Pain Last After A Tooth Extraction?
This is usually the first thing people ask, and for good reason. You can expect the most noticeable discomfort in the first 24 to 72 hours. After that initial period, you should start feeling a little better each day.
For a straightforward extraction, most people feel the significant pain has faded within about three days. If you had a more complex procedure, like getting wisdom teeth out, it's not unusual to have some mild soreness hang around for up to a week. The most important thing is that you're seeing consistent improvement.
The real sign of healthy healing is that your discomfort decreases over time. If you suddenly get hit with severe, throbbing pain around day three or four, that isn't normal. It's the classic calling card of a dry socket, and you should call our office right away.
When Can I Stop Worrying About Dry Socket?
Ah, the infamous dry socket. We know it's a big concern. The highest-risk window for developing one is during the first 3 to 4 days after your procedure. This is when that crucial blood clot is still very fragile and can be easily dislodged.
By the time you get to a week or ten days post-op, the socket has healed enough that your risk of a dry socket drops dramatically. Your best defense, without a doubt, is prevention.
To keep that healing site protected, you absolutely must:
- Avoid all suction. No straws, and no smoking for at least a week. The negative pressure created in your mouth is the number one enemy of a healthy blood clot.
- Be gentle when you spit. When you're rinsing, just let the water fall out of your mouth into the sink. No forceful spitting.
- Stick to soft foods. Anything sharp, crunchy, or even really chewy could physically disturb the clot and set your healing back.
Following these rules is the single best thing you can do to avoid this painful complication and ensure the area heals properly.
What Should The Healing Socket Look Like?
It’s tempting to peek at the extraction site, but knowing what to expect can save you a lot of unnecessary worry. The appearance of the socket changes quite a bit over the first couple of weeks.
Right after the procedure, you'll see a dark red blood clot filling the space. This is nature's perfect bandage, so leave it be! Over the next week or so, your body will start replacing that clot with something called granulation tissue.
This new tissue often looks whitish or yellowish, which understandably makes some patients think it's an infection. But in most cases, this is a perfectly healthy sign of healing. It’s the foundation your body is building for new gum tissue. From there, the socket will gradually close up, creating a smooth, healthy gum line.
Keep in mind that while the gums on the surface might look closed within a few weeks, the bone underneath can take several months to completely fill in the socket. It's a slow and steady process happening behind the scenes to restore your jaw's health.
Are There Special Instructions If I Had Sedation?
Yes, absolutely. If you received IV sedation or another type of anesthesia for your procedure, we have a few extra—and very important—safety rules for you. These are on top of all the other aftercare instructions.
First and foremost, you must have a responsible adult drive you home and stay with you for at least the next 12 to 24 hours. The effects of the sedation medication can linger, impacting your coordination, judgment, and reaction times long after you feel "awake."
For the next 24 hours, you need to strictly avoid these activities:
- Driving a car or operating any kind of machinery.
- Making important financial or legal decisions.
- Consuming any alcoholic beverages.
It’s normal to feel a bit drowsy, maybe even dizzy or nauseous, as the medication fully wears off. Start by sipping clear liquids like water or ginger ale. If your stomach feels settled, you can then move on to the soft foods we recommended. It’s crucial to follow both these sedation rules and the standard post-op care for a safe and smooth recovery.
At Grand Parkway Smiles, we believe a well-informed patient has the best recovery. If any other questions come up or something just doesn't feel right, please don't hesitate to give our office a call. We're here to support you on your way back to a healthy smile. Learn more about our patient-first approach to dental care at https://dentistkatytx.com.